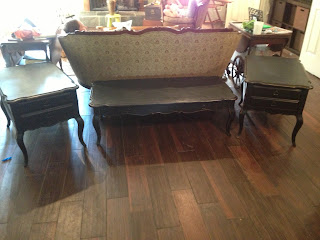
1. Start with a well made piece of furniture that has a great shape. These matching side tables and coffee table were screaming to be freed from their outdated shell!  |
2. Remove the hardware. We removed the hardware and put them in their own jar so they would not get lost (it has happened to me before ).
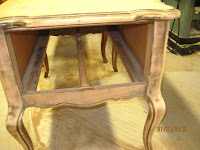
3. Sand all the pieces. My eight year old son and I got the honored job of sanding the pieces down. We went a little overboard with the power sanders, but the job got done. My husband says we just needed to sand the surface layer so the paint sticks, but I like to be thorough.
 |
| sanded |
4. Rub everything down with tack cloth. After sanding, we rubbed all the pieces down with a tack cloth. You can purchase the tack cloth at a Lowe's or Home Depot.This is to get all the dust off so the paint goes on smooth. Make sure you get all the nooks and crannies ( I am channeling my mother with that phrase ).


6. Sand again. I gave the furniture at least 12 hours to dry before I sanded it lightly with 220 grain sandpaper.
8. This is an optional step. You can sand and paint the piece one last time. I did for the side tables, but not the coffee table. The coffee table looks just as great, so the side tables probably didn't need a third coat. I purposely did this to see if the third coat made a difference and it didn't. I brushed on the last coat of paint and didn't use the sprayer because I was running out of paint and the sprayer was splattering instead of coating evenly.
9. Distress the edges. I used 220 grain sandpaper again on an electric sander to evenly sand the edges down to the wood grain. I had to hand sand the edges that the sander had a hard time getting to.

10. Stain the edges. Stain the edges with a stain pen or with stain on a Q-tip. Wipe off the excess stain.
11. Wax. This is much harder than I thought. We used clear wax and some cheesecloth. We put a very thin layer of wax on the whole piece and let it dry for at least 15 minutes. We buffed it off with an electric buffer, which didn't seem to work very well. We then buffed it with an old clean t-shirt by hand. My husband was much better at this simply because he has a lot more upper body strength. This means start lifting your weights or waxing isn't going to be your friend.
12. Put the hardware back on. Here are some pictures of the finished set.
Please contact davewhit3@gmail.com if you are interested in pieces like these.


Wow, great job guys. Wish we lived closer, I would take them :) Can't wait to see more.
ReplyDeletexxoo
Adele